Holiday Cranberry Martini Recipe

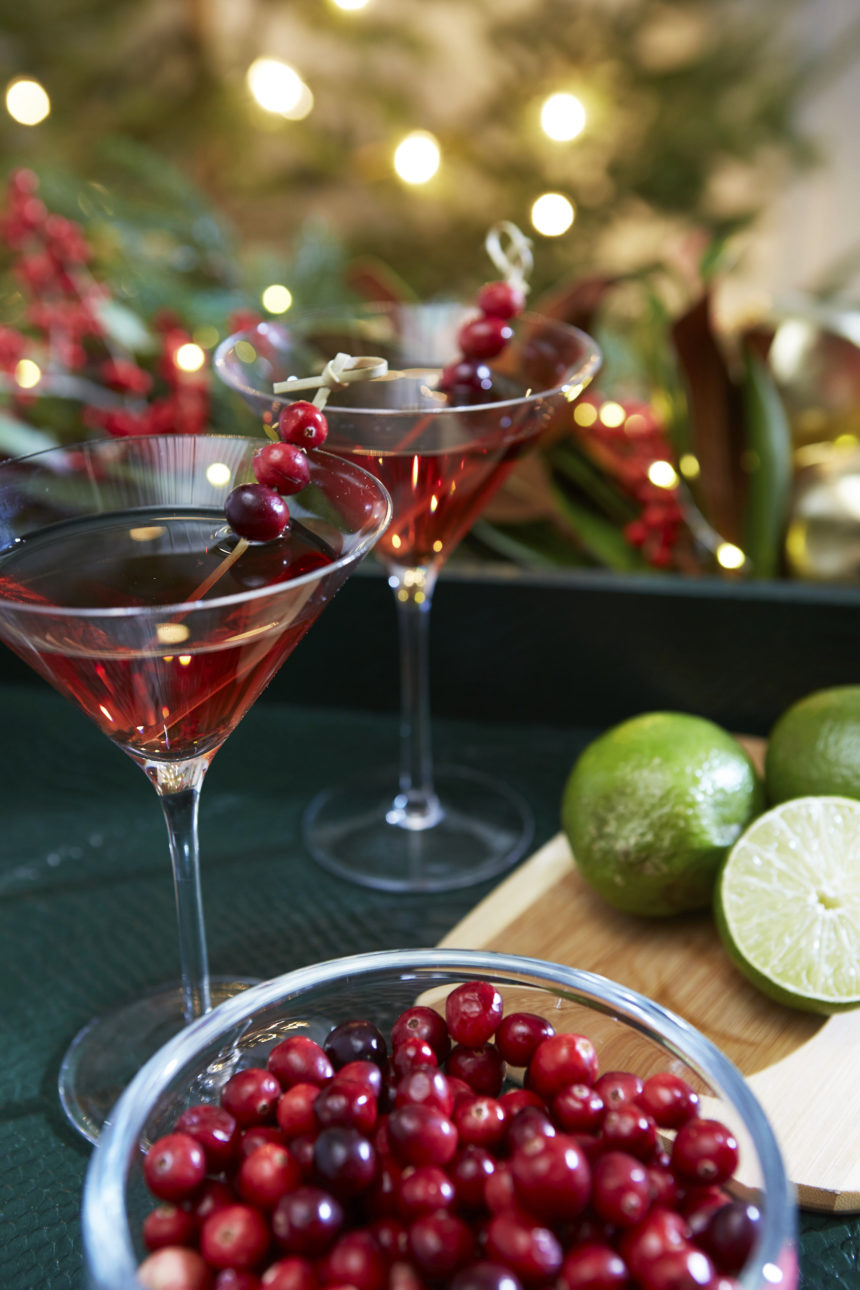
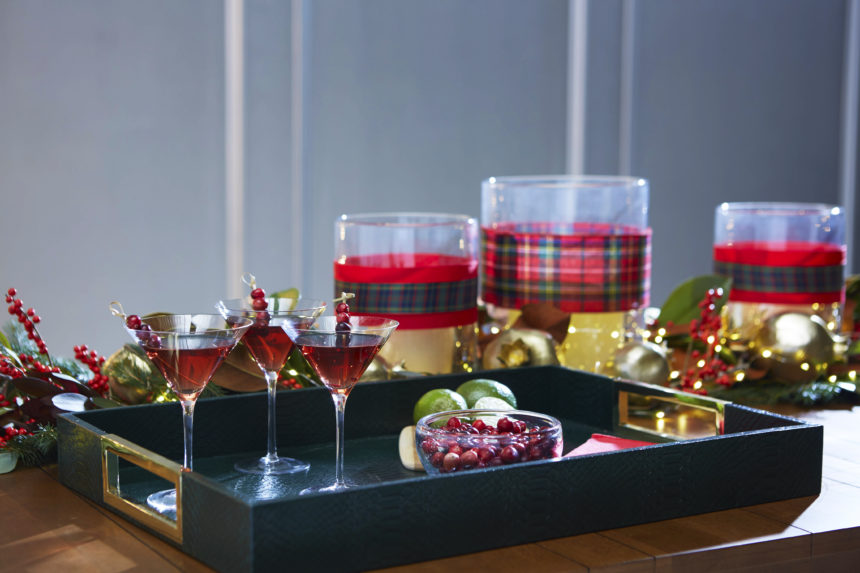
Need a signature cocktail quick? Or just a break from your hectic holiday schedule?  Try our no-fail Holiday Cranberry Martini, shown here on our Emerald Snakeskin Tray (it’s made of embossed leather—and it’s gorgeous).

Holiday Cranberry Martini

Serves 2

  • 1 oz. vodka
  • ½ oz. orange liqueur
  • ½ oz. dry vermouth
  • ½ squeezed lime
  • 2 oz. cranberry juice
  • 1 cup of ice
  • fresh cranberries for garnish

Combine the vodka, orange liqueur, vermouth, lime juice, and cranberry juice in a cocktail shaker and add the ice. Shake vigorously to chill. Strain into martini glasses, garnish with cranberries, and serve.


Recipe: Apple Cider Bourbon Cocktail

Nothing beats the chilly autumn weather like relaxing fireside with a good book, a cozy blanket, and delicious apple cider. Just in time for Thanksgiving weekend, our social media team whipped up a mouthwatering Apple Cider Bourbon cocktail. It’s super simple – and you can easily leave out the bourbon for a delightful non-alcoholic beverage. Cheers and Happy Thanksgiving!

Serves: One

  • 2 oz. bourbon
  • 3 oz. apple cider (local, if you can find some)
  • ½ oz. rosemary simple syrup
  • Cinnamon stick and fresh rosemary

1. Prepare the rosemary simple syrup:

Combine equal parts water and sugar in a small saucepan, drop in 3 or 4 sprigs of rosemary, and set over medium heat. Stir constantly until the sugar dissolves, then turn up the heat just a tick to bring the syrup to a simmer; simmer for 1 minute. Remove the saucepan from the heat and let the mixture steep, about 20 minutes. Discard the rosemary and let the syrup cool. (1 cup of water and 1 cup of sugar will be plenty for multiple drinks.)

2. In a shaker, combine the bourbon, cider and simple syrup with a few cubes of ice. Shake vigorously for a few seconds and strain into a rocks glass. Garnish with a cinnamon stick and a fresh rosemary sprig.


Tips for a Stress Free Holiday

This Thanksgiving, say goodbye to entertaining stress! These simple Thanksgiving tips can help you plan a day that everyone can love.

Make a Plan

Nothing is impossible once you break it down into simple steps! So: Get your menu set and your shopping done a few days before; jot down a schedule (e.g., what’s being cooked in what order, who’s arriving when, how you’ll pace the hors d’oeuvres, dinner, and dessert) and build in some socializing time for yourself; and make sure there’s enough seating for all your guests.


Back to the Future

Nothing beats a recipe that’s been passed down for generations. Send happy Thanksgiving memories into the future by preparing a family favorite or two – you could even have copies of the recipes for guests to take home.


Get an Early Start

Check those recipes to see what you can make in advance. Stocks for gravy, sides, and dough are all good candidates for pre-prep.


Ready…Set…Set the Table!

Tablescaping game on. Check out our Harvest tabletop here.


Card Your Guests

Hosting a crowd? Assign seats with place cards, mixing friends and family to create a more social experience.


The Warmest Welcome

Greet your guests with a signature cocktail or a steamy mug of hot mulled cider (with or without the rum!).


Open with a Wow

Feel like stretching those creative culinary muscles? Start with one over-the-top appetizer to get your party started.


Child’s Play

Set up games, an easy craft, or a space where the little ones can put together a simple yummy dessert, and they won’t have time to ask, “Is it ready yet?”


Pass the Sanity, Please

If there are lots of people or lots of dishes, simplify your hosting duties: Set up a buffet near the table and let guests serve themselves.


How to Set a Thanksgiving Tablescape

Setting a deliciously chic table for Thanksgiving is surprisingly easy—if you have a plan. We think the holiday lends itself to a harvest-inspired, rustic farmhouse look, so we chose a subtle seasonal palette: Think fall leaves (taupe, gold, burnt orange) and blue sky. We used natural materials as well as Ethan Allen decorative accents, to complete our tablescape.

Step 1: Start with any table that will comfortably seat your guests—we used our classic, plank-top Miller table to set a “country” tone.

Step 2: Lay a foundation with a few basics—be creative! Instead of using a traditional tablecloth, we draped a plaid throw (a good friend routinely uses her favorite Tartan wool blanket) diagonally across the table to show off the beautiful wood. Brilliant idea, right? One caveat: be sure you don’t mind if your tablecloth stand-in gets a little messy. Next, create a “frame” for your centerpiece using natural fall foliage from your yard and add candlesticks for height (and later, ambience).

Step 3: Can you set a fall table without pumpkins and gourds? We think not! We placed them in and around our leafy branches, mixing colors, shapes, and sizes.

Step 4: Add volume and a little bling; a few of our faux Gold Artichokes did the trick.

Step 5: Fill in the “blanks” with some seasonal fruit; we scattered a few gorgeous pears. And remember: The more imperfect it looks, the better!

Step 6: Set the table with neutral white plates or use a combo of your favorite flea market finds. We added pops of color with a mix of cloth napkins, and gave each plate a final flourish with a sprig of bittersweet berries.

P.S. After the holiday, use your greenery to make small wreaths to hang around the house—because everyone knows that leftovers are the best part of Thanksgiving!


Summer is officially over.  It’s time to close the pool, rake the leaves, plant the bulbs … but whatever you do, don’t call off the outdoor entertaining—not yet.

Even if you live in a region with four distinct seasons, there’s still time to get out and grill, chill, sip, and nosh, while hosting friends and family in style. Fall entertaining is all about creating a cozy vibe. Bring on the harvest hues and amp up the creature comforts. Swap the beach towels for toasty blankets and throws. Let there be light: Bring out the candles and lanterns, and build a fire. Think hot cocoa instead of cold brews.

And because you never know when a chill will chase the party indoors, remember to eat dessert first—especially s’mores, everyone’s fireside favorite. Our colleague Marta Eriquez was kind enough to share her recipe for indoor s’mores with a deliciously gooey twist. The best part: You can make them all year long (no fire or charred marshmallows required).

MARTA’S S’MORES BARK
Ingredients

  • 24 oz. dark chocolate, melted
  • 1 cup marshmallow fluff
  • 3 full sheets of graham crackers, crumbled

Instructions

  1. Line a 9″ x 12″ rimmed baking sheet with parchment paper or a silicone baking mat.
  2. Melt half the chocolate in the microwave and use a silicone spatula or the back of a wooden spoon to spread it on the baking sheet. Refrigerate for 20 minutes.
  3. Crumble the graham crackers and set aside.
  4. Heat the marshmallow fluff in the microwave. Quickly spread a marshmallow layer over the hardened chocolate.
  5. Press graham cracker crumbs into the marshmallow layer. Refrigerate for 20 minutes.
  6. Melt the rest of the chocolate and very gently spread it over the graham cracker layer. Refrigerate for an hour.
  7. Break into pieces and serve.

Bark can be stored in an airtight container in the refrigerator—if you have any left over!