Hello, sunshine! Summer is upon us and it’s time to lighten up—in lots of ways. If your home is feeling out of season, read on! These simple summer decorating ideas are a breeze!

1. SLIP INTO IT

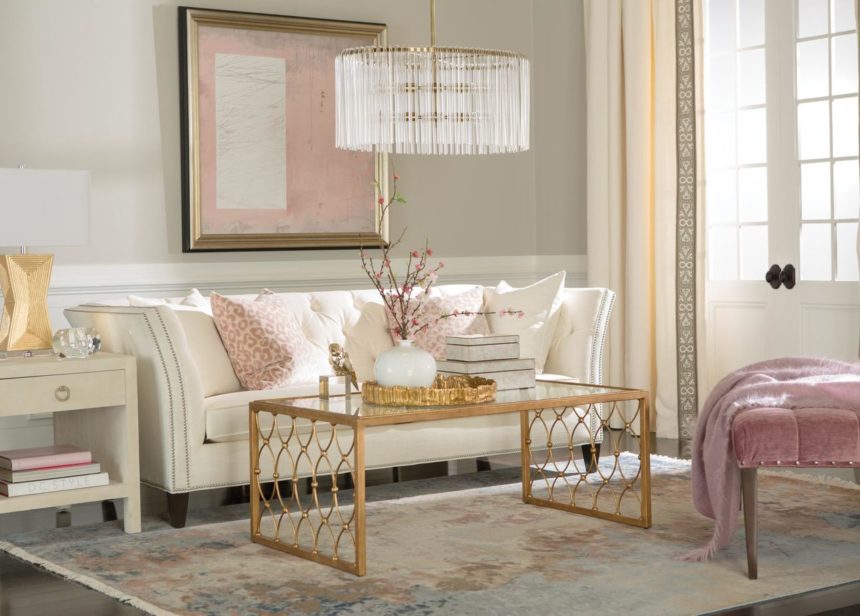
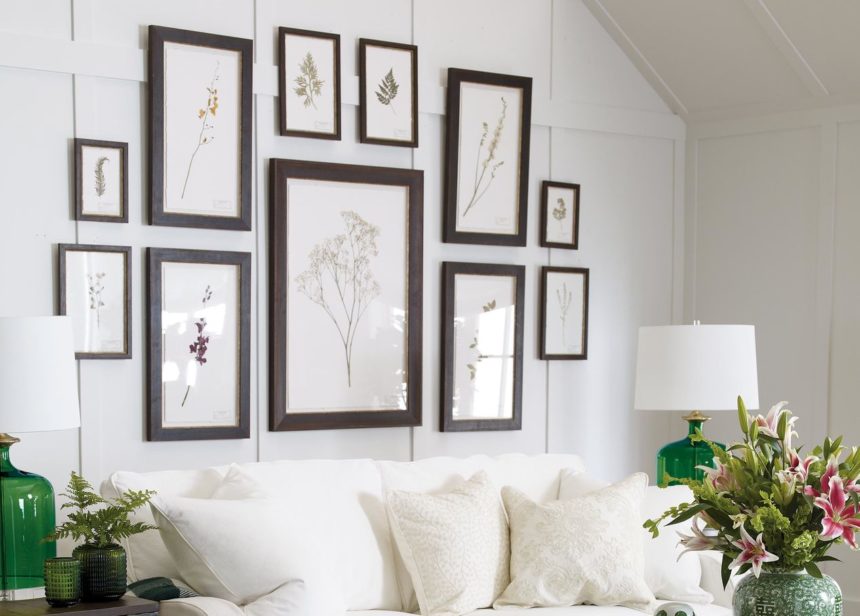
Nothing says summer casual quite like white slipcovers. Now, before you say, “no way” to white, think again. These comfy coverings are stain-resistant, durable, and easy to remove for cleaning. Still not sold? Sandy-hued neutrals can capture that easy summer vibe too!

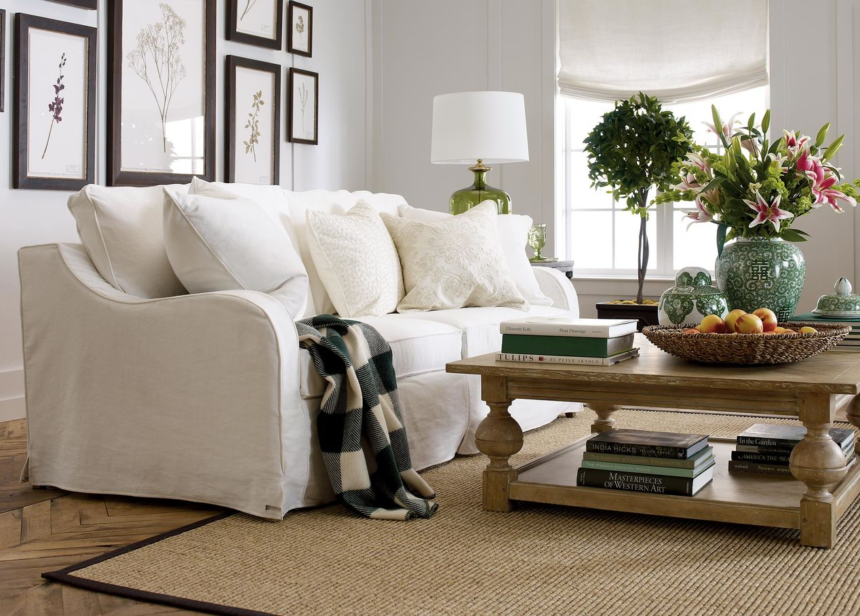
The Dylan slipcovered sofa epitomizes summer’s relaxed attitude with a laid-back style and easy-to-clean white cotton twill fabric.
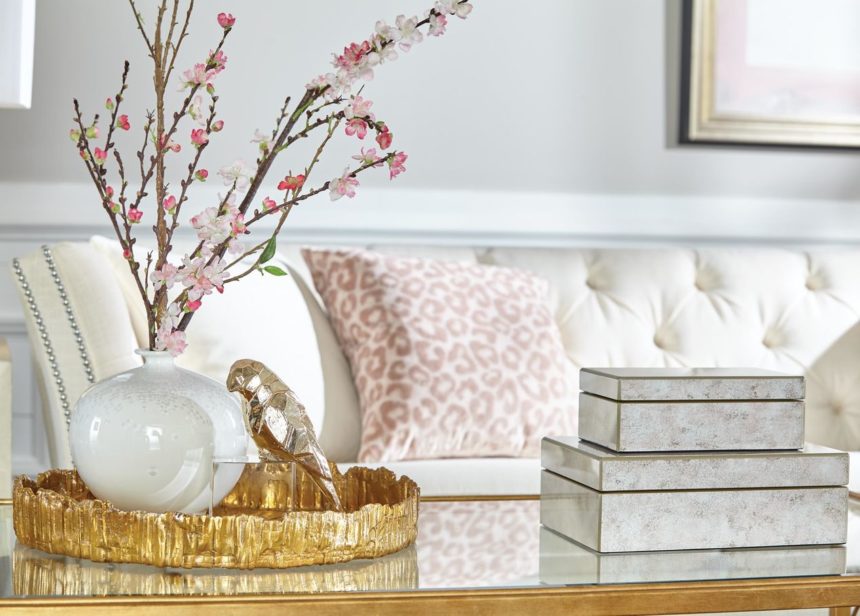
2. GO SOFTLY

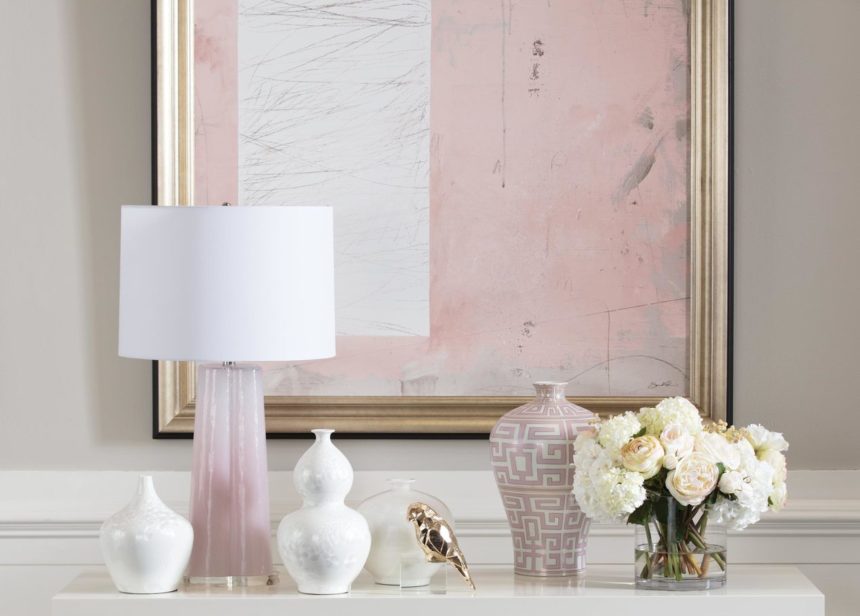
Always fun to decorate with, pillows are an instant game changer. Swap out richly colored styles for light, bright, and whimsical ones. Our designers suggest mixing it up with florals, stripes, coastal, and botanical motifs.

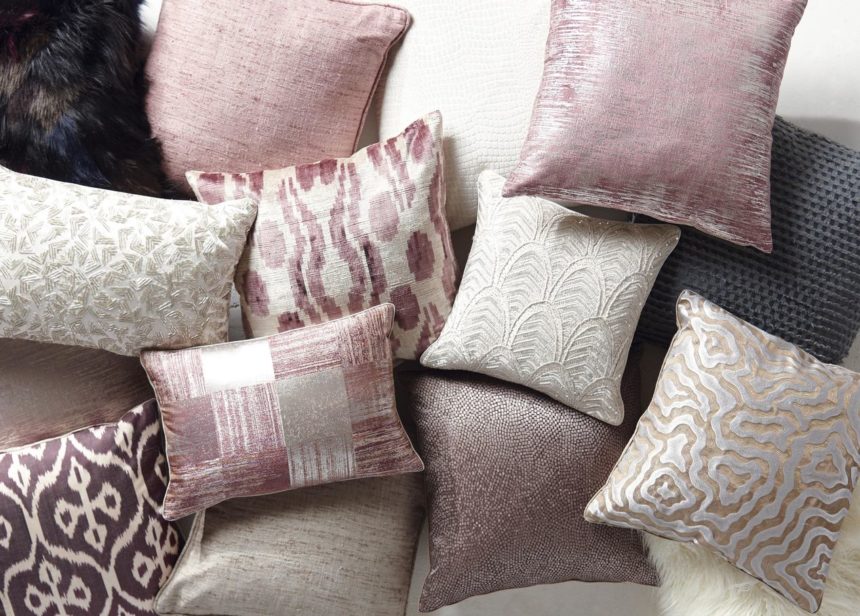
With its subtle shine and soft texture, the Metallic Pillow in blush adds sizzle to your summer style.

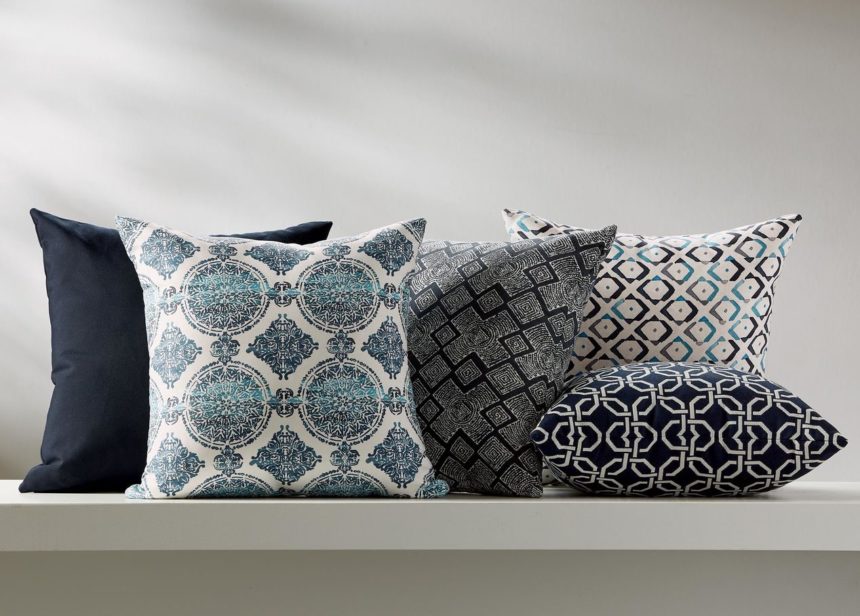
Looking for something more casual? Outdoor pillows offer chic, colorful looks that work beautifully for the indoors, too, and are super easy to clean.
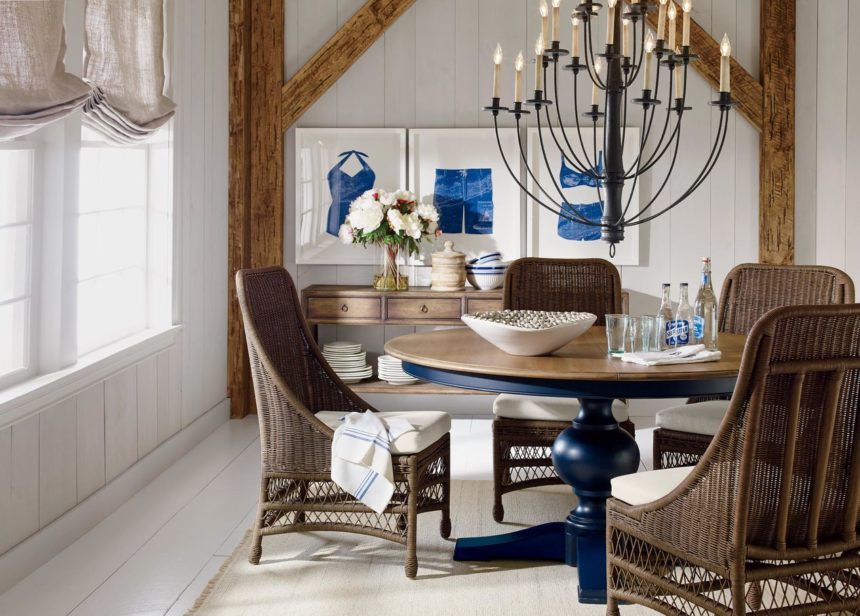
3. CLAIM YOUR COAST

What’s summer style without a nod to the shore? Coastal accents make perfect summer room décor. Create beach-inspired style with pieces that reflect what you love about the sea and sand. Does sailing make you swoon? Say it with art. Fascinated by sea life? Show your appreciation with chic coral décor pieces, or a unique coastal accent!

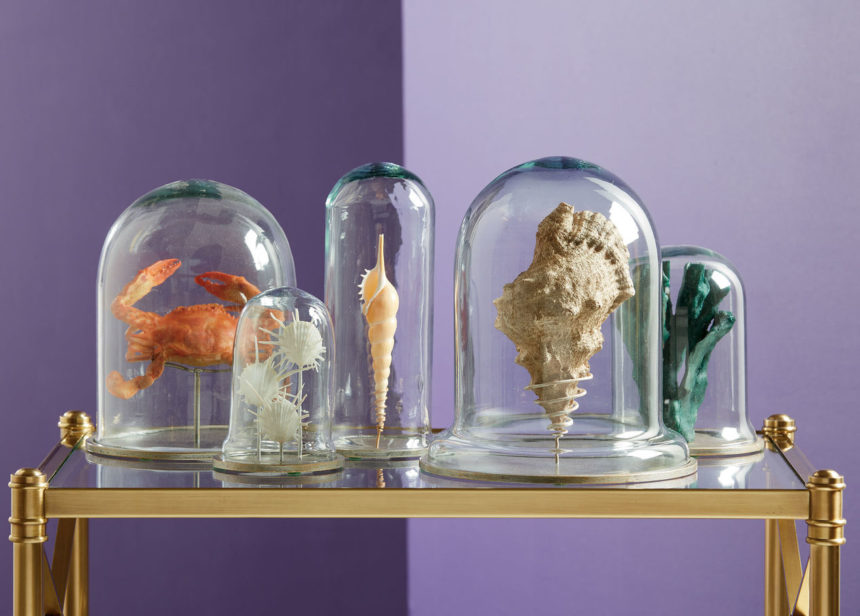
Our fanciful Crabs in Glass Cloches are handmade replicas of Maryland blue crabs, and look like finds from a walk on the shore.

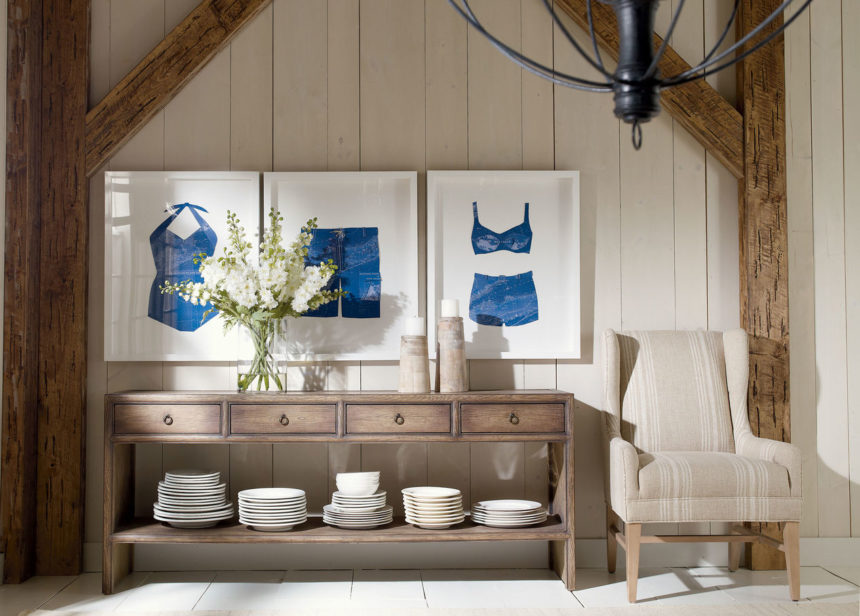
Vintage Swimsuit I paper art is a whimsical bathing beauty; the swimsuit is hand-cut from a copy of a vintage map of Montauk.
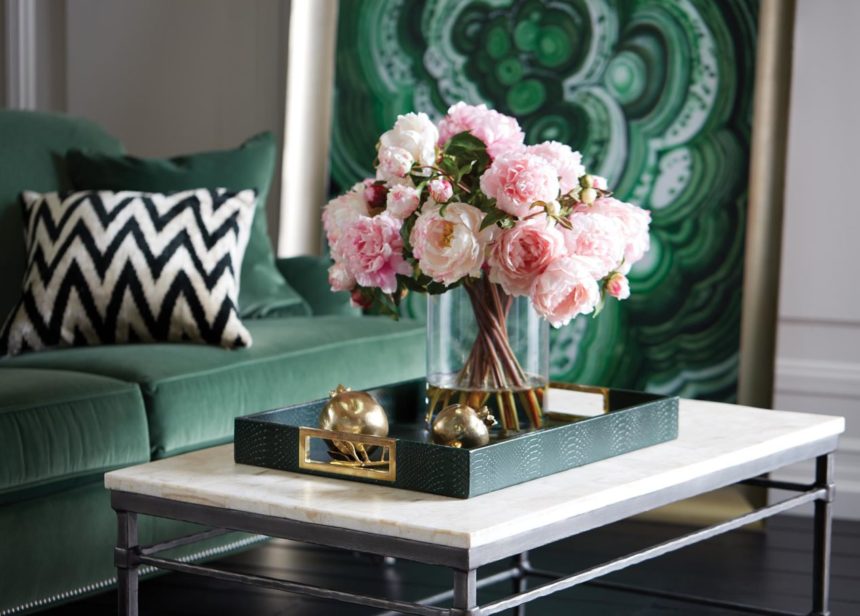
4. ACE YOUR SERVE

Trays are a must for summer soirees. They should be large enough for your needs, light enough to carry when they’re loaded up, and made with well-secured handles or comfy hand-holds. Reflective styles that catch the natural daylight will serve up your tasty thirst quenchers with dazzle. These trays also work beautifully as coffee table accents or as places to organize toiletries in summer guest rooms.

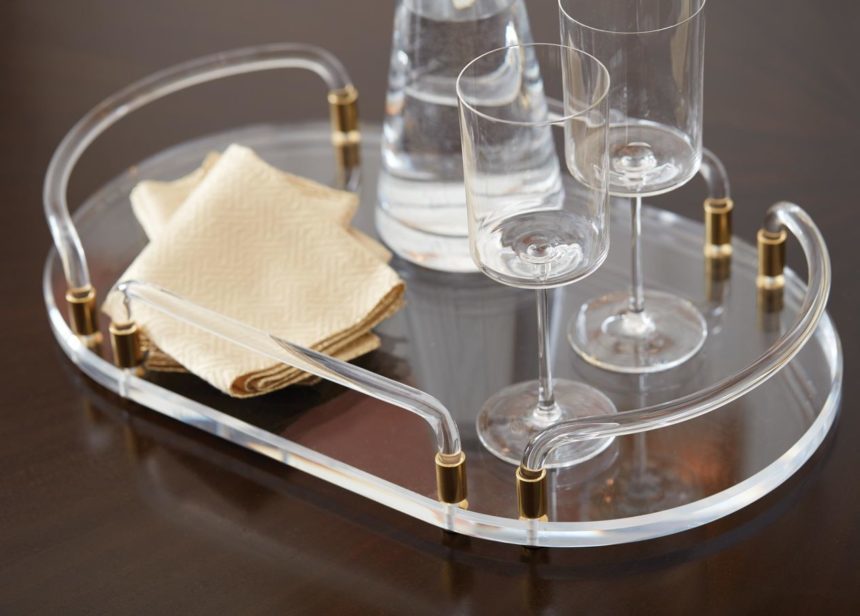
The curvy Colette Tray in clear acrylic brings a dazzling modern vibe to the party!
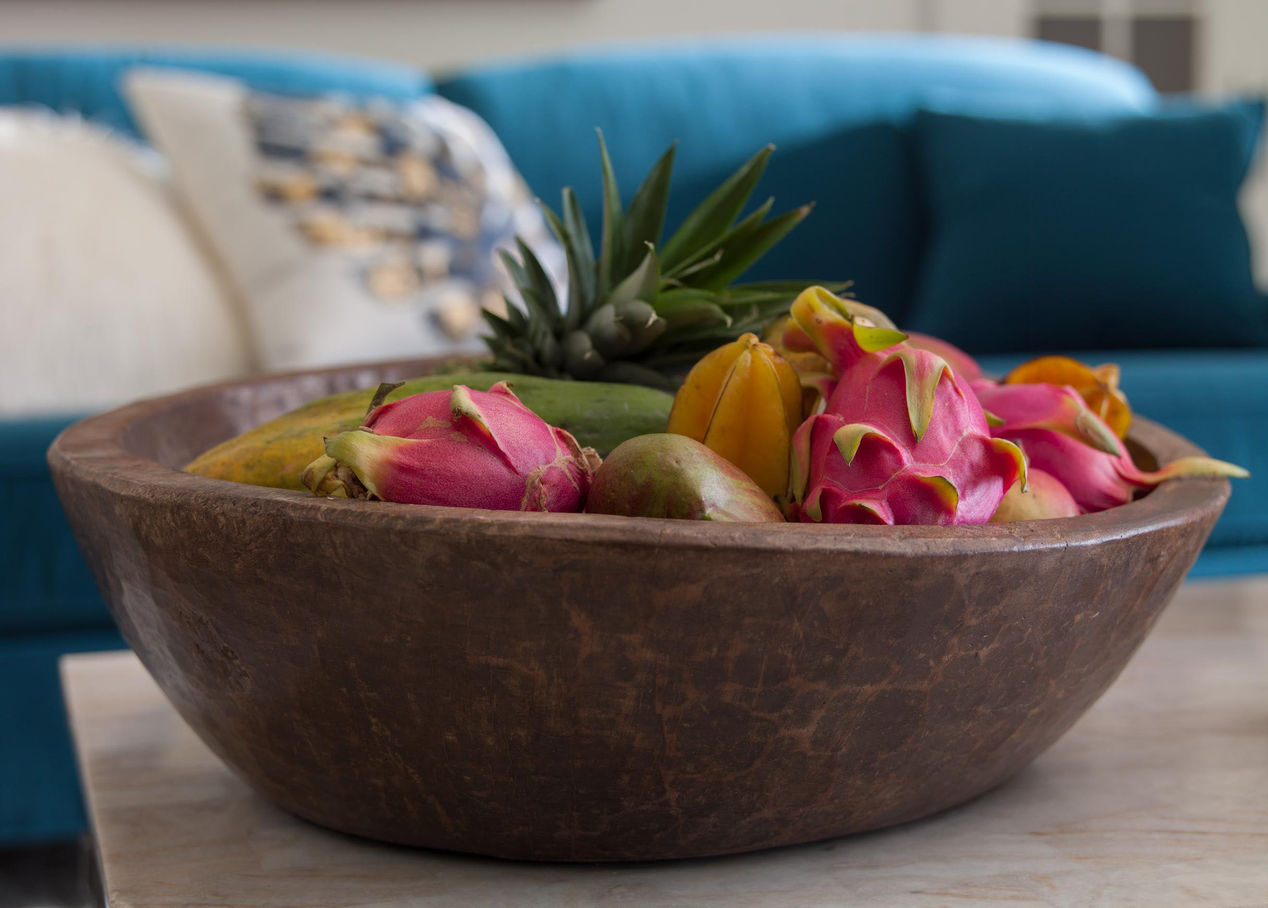
5. GO NATURAL

It’s garden season—make the most of it! Plant your favorite flowers and greenery in containers for beautiful, always-fresh summer room décor indoors or out. Our designers love urn-shaped planters for an unmistakably elegant statement at an entryway, on a deck or patio, in a sunroom…you get the picture!


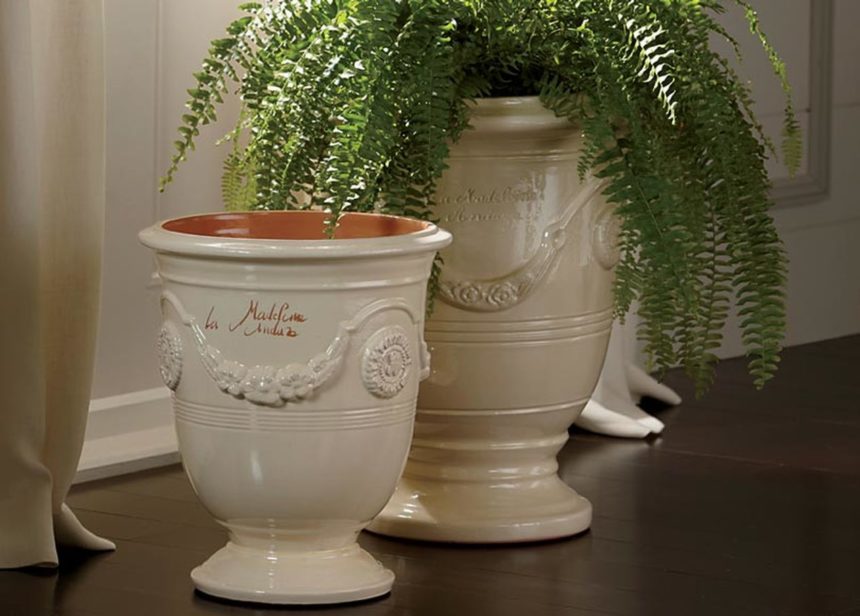
Handcrafted in a 400-year-old atelier de poterie in the south of France and glazed in an antiqued ivory, our Anduze terra-cotta planters evoke a classical vibe that’s also bright and fresh.
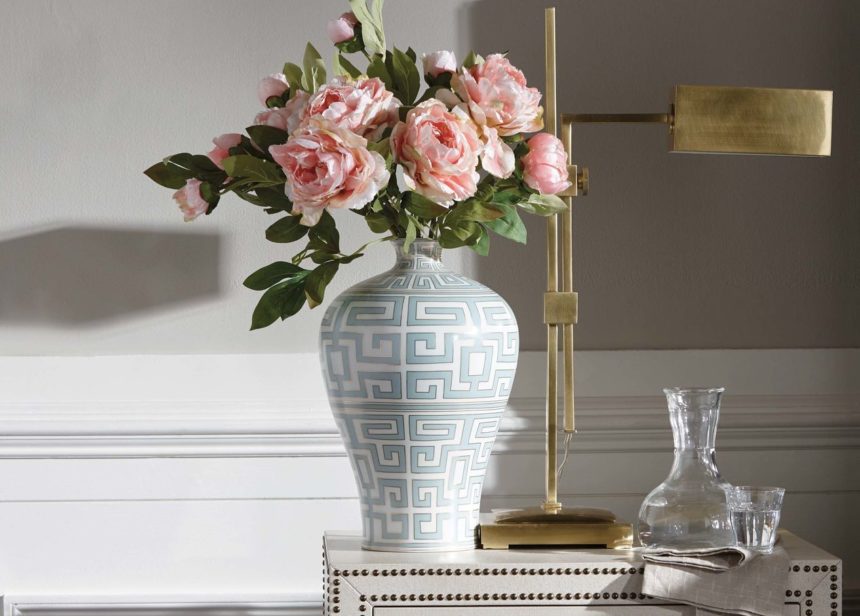
6. BEFRIEND A FAUX

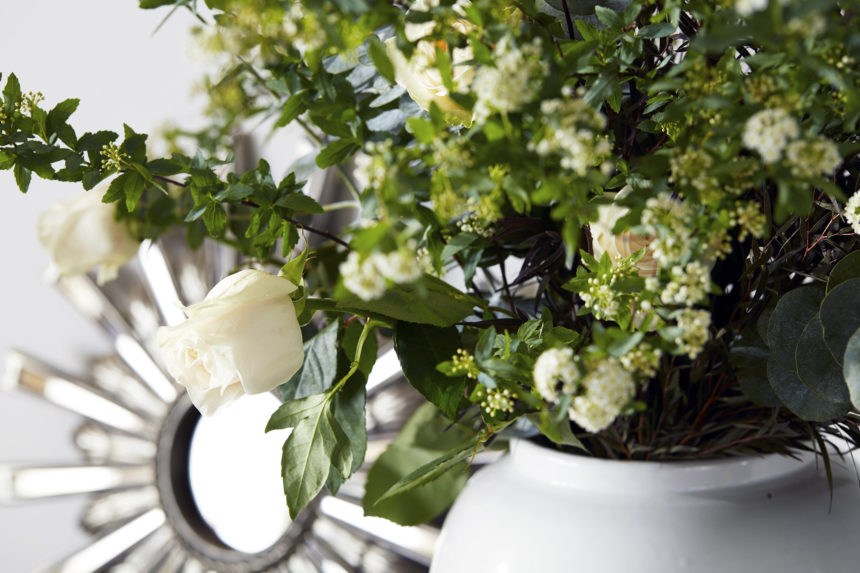
If you can’t have (or don’t want) fresh flowers in your home, grab a well-made arrangement of faux summer blooms to liven up your room. Keep in mind: Quality is the difference between tacky and tasteful, here. You want it to look just like the real thing.

Exquisitely handcrafted, the Tall Pink Peony Watergarden offers true-to-life summer blossoms for anywhere you need a touch of color.

7. SLEEP LIGHTLY

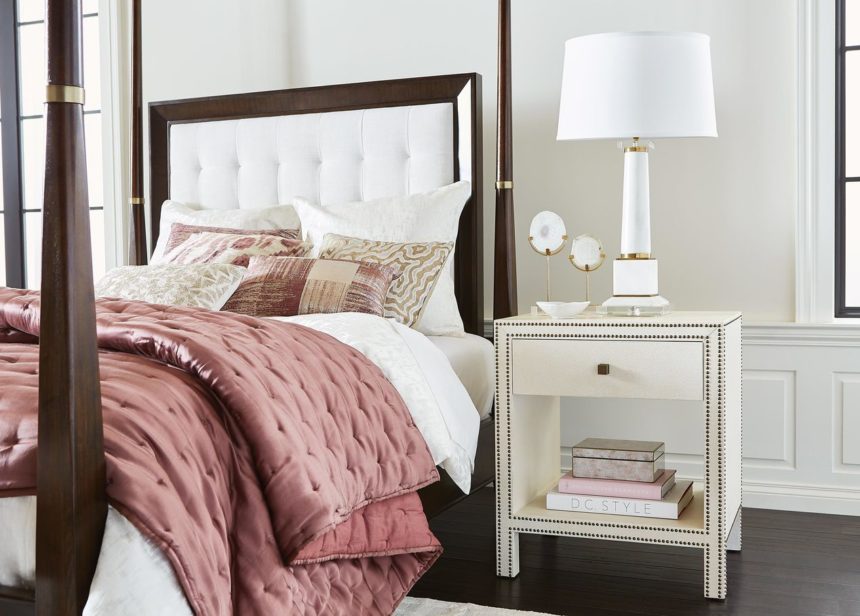
Switch out heavyweight bedding for lighter styles in breathable, cozy fabrics. Colorful floral print duvet covers in lustrous cotton sateen are always fashionable this time of year, as are matelassés and block-print quilts. This simple switch makes a big impact—especially when you dress your bed like a design pro! Discover our secrets on how to make your bed.

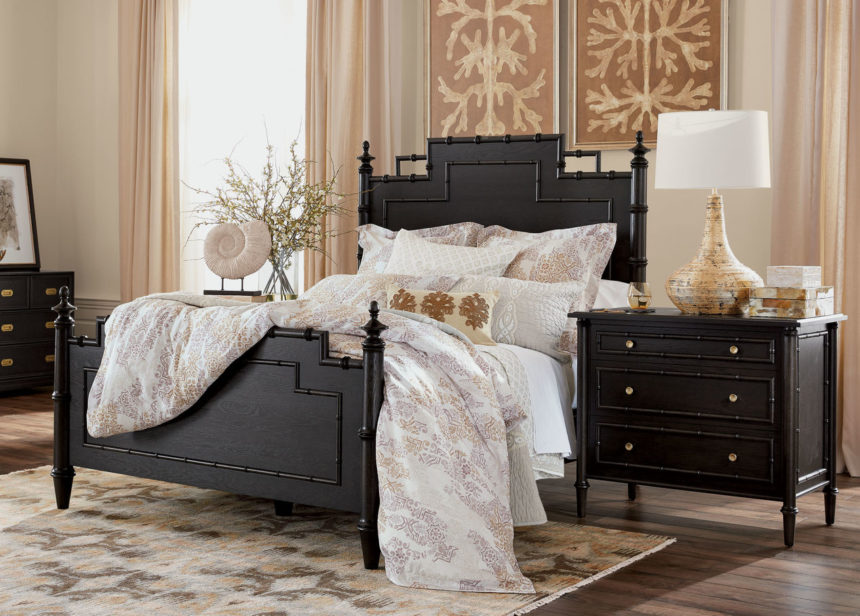
The Arcelia Printed Duvet and Giorgina Embroidered Quilt have it all: a shimmery sateen, a soft palette, and a cool, understated block print.

Looking for some outdoor decorating ideas for summer, too?  Check out these photos of real outdoor rooms shared by some of our clients, then head here to find all the outdoor rugs, pillows, and furniture you need to create your own oasis.


Summer is the perfect time to bring some color into your life. Check out these inspiration photos and tips for great summer decorating ideas.

Summer. It’s the season for bold blooms and emerald leaves—the season of color. If you’re like a lot of people, you’re ready to nix winter’s neutral palette and embrace the full spectrum of summer.

Of course, seasonal changes aren’t the only reason to add color to your space.

  • You may be an apartment dweller whose landlord insists on covering every wall with a coat of primer and keeping it that way.
  • You could be trying to escape the 1990s suburban development palette of beige, beige, and more beige.
  • You’ve gotten a bold new lease on life, and you want your home to show it!

Check out these summer decorating ideas, from subtle to splashy, that will help you bring some color into your space.

Add a Little Color Here and There

You don’t have to go big and paint your walls Ultra Violet (although it is the color of the year!). Instead, you can start by bringing in a bit of color using decorative accents, like pillows, florals, candles, and more.

Starting small is a great idea when you’re not quite sure what you like, and it’s a lot less expensive that reupholstering your sofa in lime green and regretting it later. You can experiment with some small accents for a while and easily switch them out when you’re ready for something new.

Make a Bigger Statement

If you’re more confident about your palette, but again, you’re not quite ready for that lime green sofa, then choose some bolder statement pieces that bring the pizazz. Larger-scale summer room décor, like a stunning piece of abstract artwork, can create bolder strokes—again, without breaking the bank.

Making a statement isn’t only about color; it’s also about expressing your personality and being surrounded by what you love. It’s okay to stick with neutral colors on your investment pieces, but when it comes to art, rugs, bedding, or other statement accents, follow your heart: Choose pieces in colors that make you feel happy in your space.

Go All In for Color

If you’re ready for a sofa decked out in a bold pattern—lime green? Hey, go big or go home!—then you’re ready to commit to upholstering in color. When you’re making these big decisions, help from an Ethan Allen designer can really make a difference. Visit a Design Center to check out our extensive fabric and leather options. Help from our designers is always free—and fabulous.

That Color Looks Great on You!

Check out the inspiration images below for some ideas, big and small, about bringing color into your space. Also, keep an eye out for our new augmented reality app, inHome—it will give you the power to preview Ethan Allen furniture and decorative accessories, right in your space.

For more decorating tips, subscribe to The Art of Making Home and check us out on Instagram @ethanallen.


It’s Cinco de Mayo AND Kentucky Derby day? There has never been a day in the history of mankind that has demanded a party more clearly than this one. And there has never been a piece of furniture more ready for a party than our Lora bar.

Check out this video of five ways to style our Lora bar

We’ve decided to focus on the Kentucky Derby and the classic cocktail that goes with it: the mint julep. Let’s dive into this great tradition, and, as a bonus, we’ll also give you some pro tips on serving with Lora.

The Kentucky Derby

The Kentucky Derby, which debuted in 1875, takes place at Churchill Downs in Louisville. It’s preceded by a flurry of local activities, including a spectacular air show and fireworks display called Thunder over Louisville. A general admission ticket to the Derby doesn’t guarantee anyone a place to sit, and seats are premium price, so fans start flocking into the Downs early to grab space on the central lawn.

And the hats—what would the Kentucky Derby be without these iconic fashion statements?

It’s also not Derby day without a cold, refreshing mint julep in hand. With an assist from our Lora bar, this cocktail is sure to earn a Triple Crown at your Kentucky Derby party.

Mint Julep Recipe

Although it precedes the Civil War, and reports differ over whether it was originally made with cognac or bourbon, the mint julep became the official drink of the Kentucky Derby in the 1930s. Over 120,000 mint juleps are served at Churchill Downs on Derby weekend, including 10,000 bottles of ready-to-serve cocktail, 60,000 pounds of crushed ice, and 4,000 sprigs of freshly harvested mint.

Mint juleps are traditionally served in silver cups (in fact, the Derby makes sterling silver cups for the big day), and the cups develop a lovely signature frost on the outside as you stir the cocktail. If you don’t have silver cups, don’t worry—we won’t tell. Just make sure to use good bourbon.

Oh, and start this the night before your party; you’ll need to make the simple syrup in advance.

Ingredients

2 cups sugar

2 cups water

Fresh mint

Crushed ice

Bourbon

Silver julep cups

  1. Prep the syrup. In a saucepan over medium heat, mix the sugar and water and bring to a boil. Heat until the sugar is completely dissolved and the liquid is simmering and clear. Cool the syrup it and place it in a covered container along with six to eight sprigs of fresh mint. Refrigerate overnight.


  1. Prep your workspace. On the day of your party, place your simple syrup in a bowl along with a tablespoon on the top shelf of your Lora bar. Arrange your bottle of bourbon, a bucket of crushed ice with a small scoop, and a plate of mint sprigs near the simple syrup bowl, leaving yourself a little room to make each cocktail. You can keep a shot glass handy to measure your bourbon; a shot glass holds one ounce of liquid. Place your silver cups on the Lora bar’s second level, along with some spare bourbon in case you run out.


  1. Make the juleps. Grab a silver cup and use the scoop to fill it with crushed ice. Add one tablespoon of simple syrup, plus two ounces of bourbon (two shots if you’re measuring with the glass). Stir the cocktail rapidly to chill the drink and frost the cup. Garnish with a sprig of mint.


They’re featured in all your favorite interior design magazines and blogs (like ours!), but each one is unique. The gallery wall is a home design trend that’s here to stay—and it’s easy to see why. It adds an eye-catching element to your home, can help set the theme for a room, and is a fun way to express your personality.

If the idea of putting one together seems too daunting or complicated, or you just don’t know where to start—read on! These simple tips and tricks will help you pull off a perfect gallery wall of your own—with ease.

Choose the Wall

Gallery wall arrangements have the most impact on prominent walls painted in neutral colors. This lets the artwork really shine. Colored walls can work, too: Just be sure to create contrast with frames or white mats to prevent a bolder hue from visually swallowing up the artwork.

Think Thematically

Although there are no hard and fast rules when it comes to the content, gallery walls that share a color or a theme—such as abstract or botanicals—generally look more put together. Designer tip! If all of your artwork features the same subject, use unique frames to create a more interesting gallery wall design.

Add a Surprise

Consider incorporating a mirror, chalkboard, wall clock or family photo. When selecting this element, think about the room it’s going in. A gallery with a chalkboard is right at home in an entryway or kitchen where you can keep a can’t-miss shopping or to-do list.

Decide on a Style

If you love a clean modern look, group an even number of same-sized images together to create a symmetrical gallery wall design. For an eclectic gallery wall, mix rectangle, square and even round wall décor. Groups of three, five, or nine pieces work especially well.

Now that you’ve established the overall vibe of your gallery wall, you’re ready to start installing your art – but don’t start swinging the hammer just yet. These simple steps will help you create a flawless gallery wall with a just a few supplies and some imagination.


1. Gather the following: kraft paper, pencil, scissors, tape, a hammer, nails or picture hangers and framed artwork with saw tooth hooks or a picture wire—something you won’t need to worry about if you have Ethan Allen artwork, which features a wireless hanging system.


2. Spread the kraft paper on the floor. Trace your framed pieces onto it and cut them out.


3. Arrange the cut-outs on your wall starting at eye level and tape them in place. Play with the arrangement as much as you’d like! For an avant-garde look, try an arrangement with no spacing between artwork at all.


4. On each framed piece, measure the distance between the saw tooth hook(s) or picture wire when it’s held taut and the top of the frame.


5. Measure the same distance from the top of the corresponding cut-out and insert a nail through the kraft paper at that point.


6. If you’re using Ethan Allen artwork, you can skip steps 4 and 5! Just place and press the art piece firmly against the corresponding cut-out to create dimple marks, then insert the provided self-hanging hardware at those points.


7. Remove the cut-outs from your wall, hang your artwork, and voila—the perfect art gallery wall!

Ready to get started? Mix art you own and love with new ones or create an entirely new look. We’ve got hundreds of pieces of framed and custom-framed artwork to choose from!


Five ways with the versatile Lora

She’s pretty and practical, our Lora bar. She’s sturdy, with a solid wooden frame, rugged rattan top and shelves, and rails that keep bottles and barware in place. But Lora’s more than a suitable spot for stashing spirits and stemware. She’s exotic, with a refined silhouette, wafer-thin mahogany veneers—and a tropical air. She’s an island girl with an easygoing attitude that can work any room—and is she ever helpful around the house!

Want high style in a small place? Look no further. Need a place to store (and show off) pretty things? Three roomy (2-by-3-foot) shelves at your service. Serving cocktails? Lora is always ready for a party. Taking tea? Totally! Will your guests be staying the night? Think outside the tissue box and furnish your guest room in luxury and style.

You can dress Lora for any occasion—here are a few ideas for inspiration. Check back for posts on how to get all five looks: Traveler, Tea Time, Silver Jubilee, Comfort Zone, and Mixed Drinks. Meanwhile, use your imagination; we’d love to see how you style the best bar in town. Tag photos on Instagram and we might feature them on our site. #ethanallendesign


2018 is the year you’re going to get organized—we believe in you. We have eight great pieces and some room design ideas to help you get your house in order.

1. Colton Storage Bed

Tuck away extra blankets, linens, shoes, kid toys—these roomy drawers can make clutter disappear. The Colton bed is a workhorse with the beauty of a thoroughbred. It’s also one of our most versatile beds, available in three sizes (Queen, King, California King), three headboard heights (40″, 55″, and 70″), and three headboard styles (smooth, grid tufted, or button tufted), with nailhead trim options, in your choice of hundreds of fabrics or leathers, with or without contrast welting.

Pro tip: Leave plenty of clearance in front of your Colton bed’s footboard so the drawers have room to open. You may need as much as 48″ so the drawers can open fully with you also having room to stand in front of them.

2. Ming Small Media Cabinet

Ming is for those treasures you want to display, not hide away. It features gorgeous Asian-influenced design and a variety of hand-distressed finish options.

Pro tip: This Ming cabinet would look beautiful in a small dining area, but it’s also vented for wire access in back, so you can also use it in your living room for your television, sound system, or gaming console.

3. Logan Hall Tree

Are you sick of disorder in your entryway? Our Logan hall tree is the answer. It uses one of our favorite room design ideas, which is to take advantage of height so you can get more storage without taking up too much floor space.

Logan has hooks for coats, hats, and scarves, plus a deep bench for bags and backpacks. Even better: It has two spacious storage drawers at the bottom. Plus, check your look in the mirror on your way out the door; you deserve to look as (or more!) flawless than your foyer.

Pro tip: Insert a lined shoe tray in each lower storage drawer. Then, when you need to let a pair of snow or rain boots dry, you can tuck them in the drawers and out of sight.

4. Handwoven Flo Baskets

Large floor baskets are great for storing throws, fire logs, laundry, toys, and so much more. They rest neatly against the side of a larger piece or furniture or slide discreetly beneath it.

Our Flo baskets are woven by hand in the Philippines, where artisans collect bulrushes that are as much as 6′ long. They dry each strand in the sun before weaving them—without a frame—into these gorgeous baskets.

Pro tip: Stash one of these baskets in your living room. At the end of the day, when your child has played with toys (you don’t want to step on stray Legos!), encourage them to throw the toys in the basket, take the whole basket to their room, and then put everything away.

5. Editor’s Modular System

Our Editor’s modular series is from our Ethan Allen | Disney line, and it’s an organization powerhouse. The open storage system has a variety of bases, cubbies, corner units, and even a tower so you can customize the layout to fit your space. Tuck baskets into each cubby to corral small items (our Fantastic Felt baskets will brighten up any space) or stack books, collectibles, electronics, or more inside.

Pro tip: Don’t just envision these modular storage pieces standing against a wall; the Editor’s system lets you be much more creative with your room design ideas. Try wrapping it behind a sofa or sectional or placing units back to back for use as room dividers.

6. Spindle Glass Jars

One of the biggest organization challenges is finding a way to corral small items. Our Spindle glass jars, another Ethan Allen | Disney design, provides a home for crayons, office supplies, sewing supplies, art supplies—the list goes on. It’s available in both small and large sizes for some visual variety, and you’ll love the look: It’s made by master glassmiths in Portugal.

Pro tip: Use Spindle jars and other clear jars for storage in your pantry. They can hold dry goods, like beans, pasta, and rice.

7. Chevron 24″ Square Bone Tray

Do you ever look at your coffee table, end tables, or dining table and wish you had a way to group your tabletop décor? Trays like our handcrafted Chevron bone tray put small decorative items in order. On your coffee table, use them to hold books, small plants, or remote controls; in your dining room, group a vase of flowers alongside your napkin and silverware holders.

Pro tip: This tray isn’t just for holding decorative accents. When you have a party, use it to corral chips and dips, or stash bowls of candies or nuts inside.

8. Callum Single-File Bookcase

We like file storage that doesn’t look like file storage, and that’s why we love this Callum bookcase. At the base is a roomy file drawer; above that file drawer are two storage drawers. On top of that base storage, open bookshelves store your favorite novels and your collectibles. Also, we’ll let you in on a secret that makes this bookcase incredibly versatile: It has venting and an opening to pass wires through its backpanel, so you can use it in your living room just as easily as you can use it in your office.

Pro tip: You don’t have to line up books in boring rows. Place your most beautiful books with their covers facing out, supported by spined-out books on either side. You can also place books in vertical stacks, sorting them by like colors.


On With The Show! How To Style an Open Display Cabinet

Display cabinets offer a creative and sophisticated way to showcase your style and interests, and they add lots of personality to your home. Go beyond traditional curio cabinets or glass door styles and choose open display cabinets; they offer an updated, casual feel that complements many of today’s lifestyles.

Here are a few ways to put your best style on display, right out in the open.

COLLECT YOURSELF

Mix and match your favorite curiosities or unique accents to create a curated look. Treat each shelf as a little vignette, combining artful pieces, books, and other decorative objects you love. Be sure to create a focal point in each space, playing with various heights and coordinating colors for balance. Love the well-traveled look? So do we! Decorate your display cabinet with treasures you’ve collected from your travels and globally inspired accents from our latest look, Passport .

Our Ming display cabinet, decorated with hand-sculpted vases and accents inspired by faraway places, becomes the perfect setting for an intriguing showcase.

GET ECLECTIC

Incorporate a variety of pieces into your collection, but choose a common theme for your cabinet, such as color, subject, type of piece, or material—this helps you avoid a cluttered look. Hand-painted porcelain jars and vases or ceramic platters make stunning choices. If your style leans more on the contemporary side, display one distinct piece per shelf to create a striking art gallery effect.

This themed display of dinnerware and entertaining pieces in our Christopher china and buffet cabinet makes a perfect complement to everyday dining style.

DO IT BY THE BOOK

If you have a ton of books lying around or in boxes, pick your favorites and display them for all to admire. Coffee table books are the best choices to create this look, and they make great conversation pieces! When arranging your books, play with proportion. Stack them vertically or horizontally, or organize them by color to create a curated look.

Unique artwork and dazzling silver accents add visual interest and dimension to stacks of books.

Whatever your style, opt for pieces that speak to you and you won’t go wrong. If you’re not sure where to start, just talk with one of our design pros. They can help you find pieces to complement your personal treasures or build your collection entirely from scratch, and their help is always on the house.


Celebrate the season, farmhouse style

Think “farmhouse style” and a simple, country look comes to mind: A home filled with lovingly used and pleasingly mismatched pieces. It’s a look both humble and inviting, intentionally flawed, forgiving, and easy to love. Decorating farmhouse style is authentic, making it perfect for this, the most wonderful time of the year.

SET THE TABLE
An actual farmhouse table (like our beloved Miller, with its hand-distressed, plank-effect top) is the perfect foundation for country style in the dining room. Everything about this tablescape is unfussy yet elegant, from the scalloped white plates to the striped linen hand towels that double as napkins.

GO LIVE

Bring a holiday tree in from the great outdoors and use natural greenery whenever possible.  Make place cards pop by tying tags to a few winterberry branches.

SHOWCASE YOUR COLLECTIONS
Display similar things together, tucked in amongst greenery, holiday ribbon, and other decorative elements. No collection? Start one for next season! Take advantage of post-holiday markdowns on snow globes, angel figurines, and stylized trees.

THINK VINTAGE

The past is great inspiration for decorating farmhouse style, but you don’t have to go antiquing unless you want to. Our Kata bowls are true found objects, cleaned and retreated for you, perfect in their unique imperfection.

CELEBRATE THE DIFFERENCES
Farmhouse style resists the urge to make everything matchy-matchy. Our Windsor-style Gilbert chairs, finished in charcoal, look striking against the Miller table‘s rye finish.

DO SOME HOME COOKING
Embrace the farmhouse vibe and toss together this simple, delicious dessert. The scent of apples and cinnamon hot from the oven is almost reason enough to make it!

Apple Crisp

Ingredients

  • 6 to 8 medium baking apples
  • 1 pinch freshly grated nutmeg
  • 1 pinch cinnamon
  • 2 tablespoons plus 1 cup granulated sugar
  • 1 cup flour
  • 1 pinch salt
  • 1 stick chilled butter, cubed

Instructions

  1. Heat the oven to 350ºF.
  2. Core the apples, then cut them into 3/4-inch pieces. Place the apples into a bowl and sprinkle them with the nutmeg, the cinnamon, and 2 tablespoons of the sugar. Mix to coat the apple pieces, then spread the mixture into a baking dish.
  3. In a medium bowl, combine the remaining sugar, the flour, and the salt. Add the butter and work it into the dry ingredients until crumbs form. Sprinkle evenly over your filling.
  4. Bake for 45 minutes or until the juices are thickened, the apples are tender, and the topping has turned light golden brown. Top with a scoop of your favorite ice cream and enjoy!


BE CRAFT-Y   

Humble kraft paper is a perfect canvas for creative farmhouse-style wrappings. Add a little raffia or string and a sprig of berries for supremely simple and stylish packages. Remember, you don’t have live anywhere near a farm to style your home with rustic charm. This holiday season, we send you and yours good tidings of country comfort—and joy.


How to Style a Mantel for the Holidays

If you have a fireplace—working or not—and it has a mantel, you’ve hit the holiday decorating jackpot. A mantel, or mantelpiece (or chimneypiece in England), is by definition a shelf—but it really is so much more. It’s prime real estate in any room: an instant focal point, an opportunity not to be missed.

Often, the architectural style of a mantel (and surrounding millwork) dictates how you decorate it—but not now. From candles and crystal to cherished collectibles, anything goes during the holidays.

Mantel decorating “rules” still apply:

  • Choose a center of attention.
  • Design with odd numbers.
  • Keep scale and balance in mind.
  • Add depth by layering.
  • Stick with your theme.

Following these principles, we styled our own holiday mantel to show you how it’s done. Let us take you through it, step by step.

  • Focus! Center a large mirror or work of art on the mantel and lean it close to the wall. For our spectacular statement piece, we chose our Aged Silver Provincial mirror; it always sets an elegant mood.
  • Go green. Place natural evergreen garland along the length of the mantel, dangling some over the sides for a lush look. Drape greenery on your mirror or artwork, too—for dramatic effect.

  • Add a little color. We chose sprigs of red winterberries.
  • Go glam with a few metal accents. Our lovely Pomegranates (available in gold, brass, or nickel finishes) and ever-popular Song Birds add some shimmer.
  • See the light. Amp up the ambience with candles in hurricanes wrapped in red ribbon. DIY tutorial: A RIBBON RUNS THROUGH IT 
  • Turn on the sparkle! We finished our mantelscape with mini battery-powered LED lights.


No mantel? No worries! Try this on any long-ish horizontal surface: a buffet, a console table, or the top of a bookcase or china cabinet.


Crafty Ways to Decorate With Ribbon

When it comes to seasonal décor, ribbon is one of the most versatile materials there is. Everyone knows ribbon can transform a gift—even one wrapped in plain brown paper—with a simple twist, knot, or bow. Ribbon can give a tired wreath a festive twirl in seconds. It can dress your dining chairs for dinner. And it can stand in for garland, then top a tree with sparkling finesse. We love ribbon of every stripe, whether wide, wired, plaid, pinked, grosgrain, or velvet.

We unspooled some holiday classics (a pair of tartans and razzle-dazzle reds) to jazz up a couple of our favorite everyday accents. With a snip here, and a snip there, we used ribbon to create holiday statement pieces—and you can, too. Let’s get rolling!

Wrap candleholders with lovely tartan ribbon to give your tabletop or mantel a quick holiday update. We used our simple glass hurricanes, available in three sizes. Cut lengths of ribbon two inches longer than the circumference of the hurricanes. Wrap ribbon around each hurricane, folding over the extra. Secure with double-sided tape. Layer narrow ribbon over wide for added cheer!

Our Oval Link tray is fab as is—perfect for displaying decorative objects, candles, flowers, or for serving up your favorite cocktail. We used narrow, red satin ribbon to add a pretty punch of color. Just weave your ribbon through the links, leaving about two inches to neatly fold over and secure with double-sided tape.